


Last Updated: November 1, 2026
Quick Summary
To winterize a landscaping trailer, empty and clean the bed, drain all water lines and tanks, protect the battery and tires, prevent rust, and winterize the equipment it carries. Doing this before the first hard freeze prevents the cracked fittings, dead batteries, and flat tires that cost you time in spring.
- Empty fuel cans, fertilizer and bagged product before anything else.
- Drain water lines, tanks and low-point drains before the first hard freeze.
- Disconnect the battery and store it above freezing, checking charge monthly or every two months.
- Inflate tires to sidewall pressure and lift the trailer on jack stands if possible.
- Use a breathable cover with a small gap for airflow, since tight covers trap condensation.
Table of Contents
- Why a Landscaping Trailer Needs Winter Prep
- Clean the Trailer and Clear Out Equipment Residue
- Drain Water Lines, Tanks and Low-Point Drains
- How to Protect a Trailer Battery in Winter
- Winter Trailer Tire Maintenance and Parking Position
- How to Prevent Trailer Rust During Storage
- Landscaping Trailer Winter Storage Checklist and Spring Startup
- Frequently Asked Questions
Why a Landscaping Trailer Needs Winter Prep
Winter is the hardest season on a landscaping trailer, and most owners only discover the damage in spring. A common pattern is a trailer parked for the season with mud packed into its floor, a dead battery, and flat tires that cracked from sitting. Learning how to winterize a landscaping trailer takes an afternoon, and it prevents the repairs that eat into your first month of spring work.
A landscaping trailer carries a different load than a recreational one. It hauls mowers, trimmers, blowers, fuel, fertilizer, and sometimes wet clippings, all of which leave residue that corrodes metal and invites pests. Treat winter storage as a maintenance job, not a parking decision.
Clean the Trailer and Clear Out Equipment Residue
Start by emptying the trailer completely. Remove fuel cans, leftover fertilizer, bagged product, trimmer line, and any hand tools, since moisture and chemicals sitting in the bed cause rust and attract rodents.
Next, sweep out grass clippings, soil, and debris, then wash the floor and walls with mild soap and a soft scrub brush. Rinse thoroughly and let everything dry in the open air before closing the doors. A common mistake is closing up a trailer while it is still damp inside, which traps moisture against the frame all winter.
Pay attention to the areas where equipment mounts and ramps hinge. Caked-on residue in these spots holds water against metal, so clean them as carefully as the floor. Fertilizer and pesticide residue is the worst offender: it is corrosive to aluminum and painted steel and it draws moisture. If you haul fertilizer or ice-melt bags, rinse the bed with plain water and let it dry completely before storage.
Winterize the Equipment, Not Just the Trailer
A landscaping trailer is only half the job, the mowers, trimmers, and blowers on it need their own winter prep, and this is where most guides stop short.
- Fuel systems. Fill tanks to reduce condensation, add a fuel stabilizer per the product label, and run the engine for a few minutes so treated fuel reaches the carburetor. For two-stroke equipment, mix fresh fuel with the correct oil ratio and run it through the unit. If the manufacturer recommends draining fuel instead, follow that guidance, some small-engine makers specify running the carburetor dry for long storage.
- Batteries. Remove batteries from walk-behind mowers and stand-on units, clean the terminals, and store them on a maintainer above freezing. A battery left in a cold machine discharges and can freeze and crack.
- Blades and decks. Scrape the underside of mower decks, sharpen or replace blades, and coat bare metal with a light oil to slow rust. Remove caked grass, which holds moisture against the deck.
- Trimmers and blowers. Drain the fuel tank or run the unit dry per the manufacturer, clean the air filter, and store the unit off the floor.
- Ramps and tie-downs. Inspect ramp hinges and straps for fraying or rust, and store straps coiled and dry so they do not mildew.
Label fuel cans by mix ratio and date before storage. Come spring, stale or mislabeled fuel is one of the most common reasons a trimmer or blower will not start.
Once the equipment is out and prepped, the trailer itself is easier to clean and inspect, and you will not be storing a machine full of fuel and clippings next to bare metal all winter.
The table below summarises the key cleaning and drying steps from this section.
| Step | What to do | Time or frequency |
|---|---|---|
| Empty the trailer | Remove fuel cans, fertilizer, bagged product and hand tools | Before anything else |
| Sweep debris | Clear grass clippings, soil and debris | Before washing |
| Wash the floor and walls | Use mild soap and a soft scrub brush | Then rinse thoroughly |
| Dry the interior | Let everything dry in the open air | Fully dry before closing doors |
| Rinse fertilizer residue | Use plain water on beds that carried fertilizer or ice-melt | Let dry completely before storage |
Drain Water Lines, Tanks and Low-Point Drains
Many landscaping trailers carry a wash tank, a hose reel, or a water system for cleaning equipment. Any water left in these lines can freeze and crack fittings, so drain them before the first hard freeze. Open the low-point drains, run the pump briefly to clear the lines, and leave the valves open while the trailer is stored.
If your trailer has a water heater or any fixtures connected to a tank, drain those as well. Water that sits in low spots is the most common source of freeze damage, so check every fitting and make sure nothing holds standing water.
How to Protect a Trailer Battery in Winter
Cold weather slows a battery's ability to deliver power, and a battery left discharged over winter can fail permanently. Disconnect the battery and store it somewhere dry and above freezing, such as a garage shelf. Keep it on a trickle charger or check the charge every month or two.
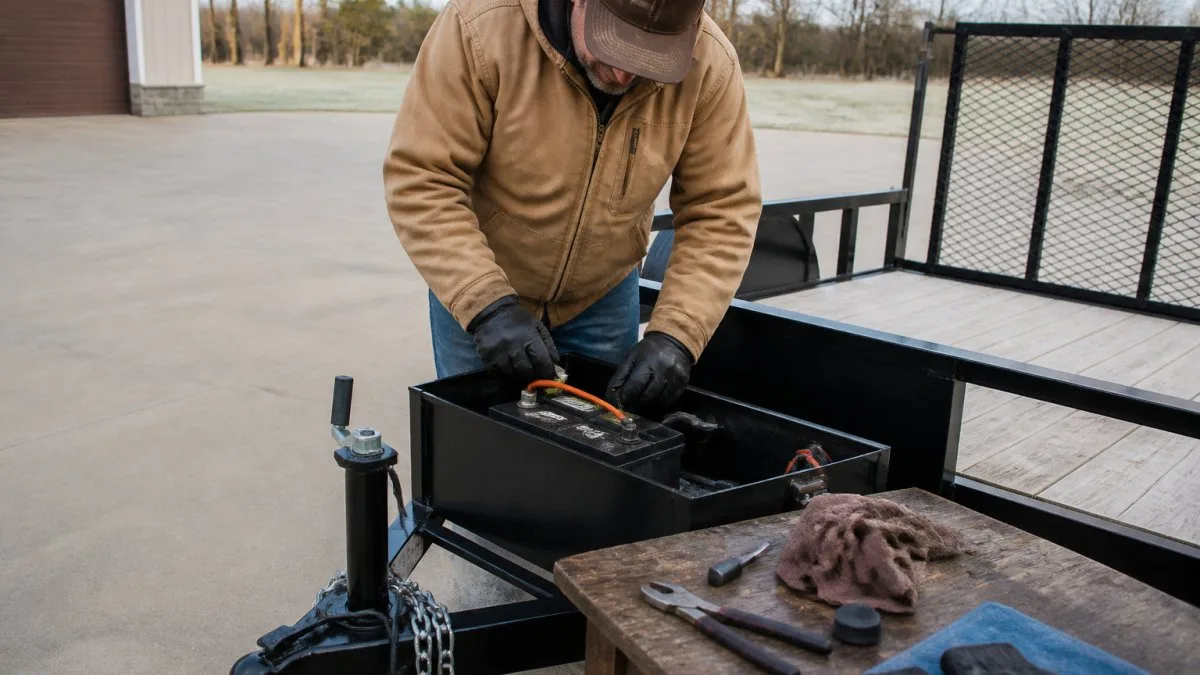
Clean the terminals with a wire brush and a baking soda solution, then coat them with dielectric grease to slow corrosion. Disconnect the negative terminal first and reconnect it last whenever you service the battery.
Winter Trailer Tire Maintenance and Parking Position
Tires lose air slowly in cold weather and develop flat spots when they sit on the same section of pavement for months. Inflate them to the pressure printed on the sidewall, and if you can, lift the trailer on jack stands so the tires are off the ground. For more detailed steps on caring for tires before storage, see detailed tire maintenance steps.
Park the trailer on a level, stable surface, away from standing water and out of direct soil contact. Place wheel chocks behind the tires, and set the trailer jack at the correct height so the frame sits evenly. Covering the tires with breathable material helps protect them from UV exposure, which breaks down rubber over time.
How to Prevent Trailer Rust During Storage
Rust starts where moisture collects and stays. Inspect the frame, welds, fasteners, and floor seams for scratches or peeling paint, and touch them up with primer and paint before storage. Lubricate hinges, latches, and the coupler so they do not seize.
Covering the trailer protects paint and finish, but a tight cover traps condensation. Use a breathable cover and leave a small gap for airflow. Ventilation and a dry storage area do more to prevent rust than any coating alone.
Trailer-Specific Maintenance and Safety Checks
Winter storage is the best time to catch mechanical problems, because you are not under pressure to get to a job. Work through these systems before you park the trailer:
- Brakes. If the trailer has electric brakes, inspect the brake shoes, drums, and magnets for wear and rust. Look for cracked or frayed brake wiring at the axle, and check that the breakaway switch and battery are functional. On surge brakes, check the actuator and fluid level per the manufacturer.
- Wiring and lights. Test every light, running, brake, turn, and reverse, and inspect the harness for chafed insulation, corroded connectors, and water intrusion. Dielectric grease on the connectors slows corrosion over winter.
- Bearings and hubs. Repack wheel bearings or, on sealed hubs, inspect for play and grease leaks. Spin each wheel and listen for grinding or roughness. Bearing failure is one of the most common causes of roadside breakdowns in spring.
- Coupler and safety chains. Inspect the coupler for wear, lubricate the latch, and check that safety chains and hooks are not stretched or rusted.
- Tires. Check for sidewall cracks, uneven wear, and proper inflation. Tires that sat flat all winter often fail early the next season.
- Corrosion hotspots. Pay close attention to the tongue, axle mounts, fenders, and the seams where the floor meets the walls, these collect road salt and moisture. Rinse the underside after the last haul of the season, especially if you drove on treated roads.
Do not store a trailer with wet brakes or wet wiring. Moisture trapped in brake drums and connectors over winter is a leading cause of seized brakes and dead lights in spring.
Record what you find. A short note on tire pressures, bearing condition, and any parts that need replacement makes spring startup faster and helps you budget for maintenance before the season begins.
Landscaping Trailer Winter Storage Checklist and Spring Startup
Use this checklist before you park the trailer for the season:
- Empty all fuel, fertilizer, and bagged product
- Sweep and wash the floor, walls, and equipment mounts
- Let the interior dry completely
- Drain water lines, tanks, and low-point drains
- Disconnect and store the battery above freezing
- Inflate tires and park on a level surface
- Inspect and touch up paint on the frame and welds
- Lubricate hinges, latches, and the coupler
- Cover with a breathable cover and check for pests
When spring arrives, reverse the process: reconnect the battery, refill and test the water system, check tire pressure, and inspect the trailer for any winter damage before you hitch up. Pricing depends on the item, quantity, and timing, so visit True North Trailers and Equipment's website for current prices or a quote.
Frequently Asked Questions
How do you winterize a landscaping trailer?
Start by cleaning the trailer to remove grass, soil, fertilizer and fuel residue, since these hold moisture and accelerate rust. Next, drain water lines, the water heater if equipped, and any low-point drains. Disconnect and store the battery somewhere above freezing, check and adjust tire pressure, block the wheels or raise the trailer off the tires, and cover it with a breathable tarp. Finally, lubricate hitch and jack points and inspect bearings. Work through these steps in the same order each year so nothing gets skipped, and keep a written checklist in the storage area.
What should you remove from a landscaping trailer before winter storage?
Remove anything that holds moisture, attracts pests or can be damaged by cold. That includes loose tools, fuel cans, fertilizer and chemical containers, rags, straps soaked with fluid, and any food or seed. Empty and clean any spreaders or hoppers thoroughly. Take small-engine equipment off the trailer if possible, and drain or stabilize fuel in mowers, blowers and trimmers before they go into storage. Clearing the trailer also makes rust and mouse inspections far easier in spring.
Should you cover a landscaping trailer during winter?
Yes, but choose a breathable cover rather than a plastic tarp that traps condensation. Trapped moisture accelerates rust and can promote mildew on decking and upholstery. Keep the cover snug without rubbing paint or trim, and leave ventilation at the front and back. If the trailer is stored outdoors, a cover combined with a level, well-drained parking spot does more to protect the frame and tires than any single product.
How often should you check a trailer stored for winter?
Check it at least once a month during winter, and after any heavy snow, ice or rain event. Look for water pooling under the trailer, tire flat spots or sidewall cracking, rodent activity, cover damage and any fluid leaks. Confirm the battery is still disconnected and charged if you use a maintainer. Brief checks like these catch small problems before they turn into spring repair bills.
