


Quick Summary
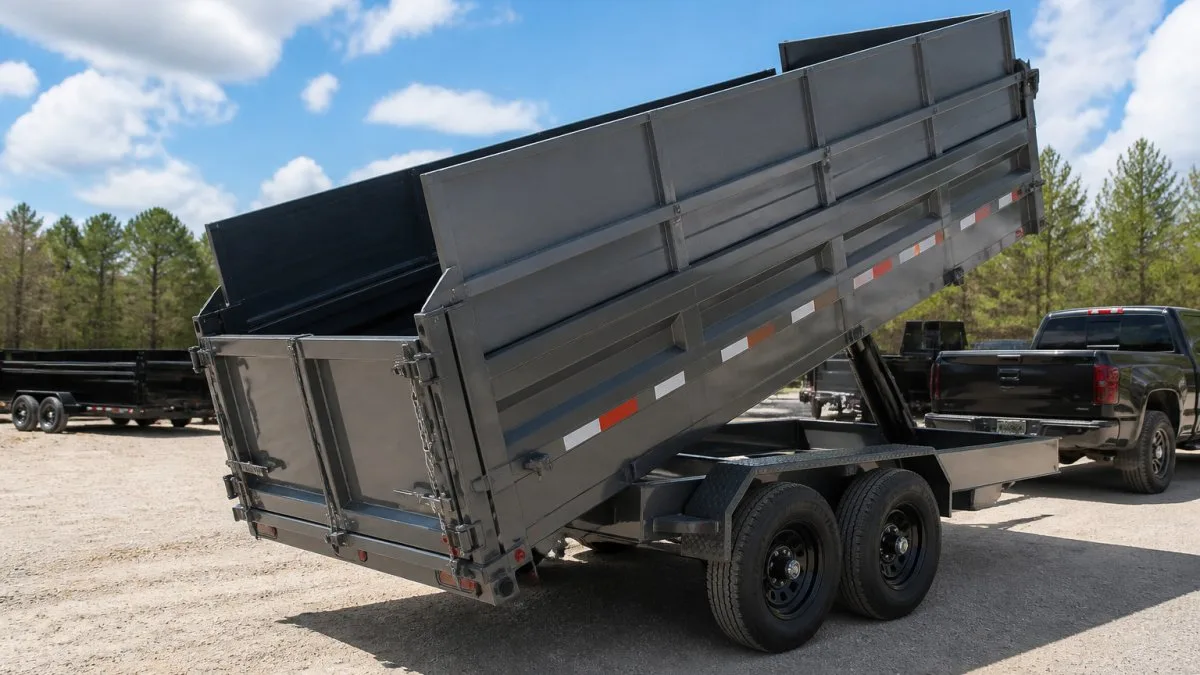
Dump trailer side extensions add height to the sides of a trailer's tub, increasing hauling volume without changing its footprint. They are most useful for landscapers, contractors, and property owners whose loads regularly spill over the top rails. Check your typical loads before buying, since extensions add weight.
- Pre-made kits fit specific trailer models and can install faster than custom-built extensions.
- Steel is the most durable but heaviest material, aluminum is lighter, and wood is cheapest but wears fastest.
- Measure rail profile and sidewall height, since trailers of the same length can need different kits.
- Use locking nuts or thread-locker, and re-torque all fasteners after the first few miles of driving.
- Extensions add weight, so stay within the axle and gross weight ratings even when volume allows more.
Table of Contents
- What Dump Trailer Side Extensions Do and Who Needs Them
- Types of Side Extensions: Pre-Made Kits Versus Custom-Built
- Dump Trailer Side Board Installation: Tools, Brackets, and Steps
- Dump Trailer Side Extension Kit Fit: Measuring Your Trailer First
- Payload Limits, Axle Ratings, and Safe Loading With Extensions
- Dump Trailer Tarp Kit and Other Useful Accessories
- Booking Your Side Extension Fitting at True North Trailers and Equipment
- Frequently Asked Questions
What Dump Trailer Side Extensions Do and Who Needs Them
Last Updated: October 31, 2026
Dump trailer side extensions add height to the sides of a dump trailer's tub, which increases the volume it can carry without changing its footprint. For contractors and landscapers who regularly haul loose material like gravel, mulch, or demolition debris, that extra volume can mean fewer trips to the job site or the disposal yard.
Side extensions, sometimes called side boards or side walls, are typically bolted or clipped onto the existing sidewalls. They are usually made from steel, aluminum, or treated wood.
Extensions are most useful for:
- Landscapers moving bulk mulch, topsoil, or stone
- Contractors hauling construction debris, concrete chunks, or roofing material
- Property owners clearing brush, leaves, or yard waste in larger batches
- Small businesses that need more volume without buying a second trailer
Not every operation needs them. If your loads are mostly dense material that never reaches the top of the tub, extensions add cost and weight without adding usable capacity. Before you buy, check how full your current trailer actually gets on a typical job.
Types of Side Extensions: Pre-Made Kits Versus Custom-Built
Most side extensions fall into two groups: pre-made kits and custom-built extensions. Pre-made kits are designed for specific trailer models and sizes, so they arrive with brackets and hardware matched to your trailer. If you are weighing a kit against a new setup, you can browse dump trailers for sale in Louisiana to see what is available.
Pre-made kits are designed for specific trailer models and sizes, and they can install faster. They fit only the trailer sizes the manufacturer designed them for. Custom-built extensions can match an unusual tub size or a trailer with modifications, and they let you specify height, material, and mounting style.
A common mistake is buying a kit based on the trailer's length alone. Two trailers of the same length can have different sidewall heights and rail designs. Confirm the exact model and dimensions before you order anything.
Side Extension Height and Dimensions
Extension height is the number that most affects your hauling capacity and your legal load limits. Taller extensions add more volume, but they also raise the center of gravity and increase wind resistance on the road. A moderate extension height often gives you a meaningful capacity gain without making the trailer top-heavy.
When comparing options, look at three measurements: the added height in inches, the length of each extension, and the total usable volume after installation. Ask the seller for the cubic yard capacity with and without the extensions so you can compare the real gain.
Steel, Aluminum, and Wood: Material Trade-Offs
Each material has clear strengths and weaknesses:
- Steel is the most durable option for heavy debris and abrasive loads. It is also the heaviest, which reduces your payload.
- Aluminum is lighter, so it preserves more payload capacity. It costs more up front and can dent under heavy impact.
- Wood is the least expensive and easiest to replace, but it wears faster and can absorb moisture.
Contractors hauling rock or demolition material and landscapers moving lighter loads will have different material needs, depending on how much payload they want to protect.
Dump Trailer Side Board Installation: Tools, Brackets, and Steps
Installation is usually a one-person job that takes an afternoon, though pre-made kits can go faster. Installation time depends on your trailer and kit. The sequence below covers fit-up, fastening, gate operation, and the inspection checks that catch problems before they become roadside failures.
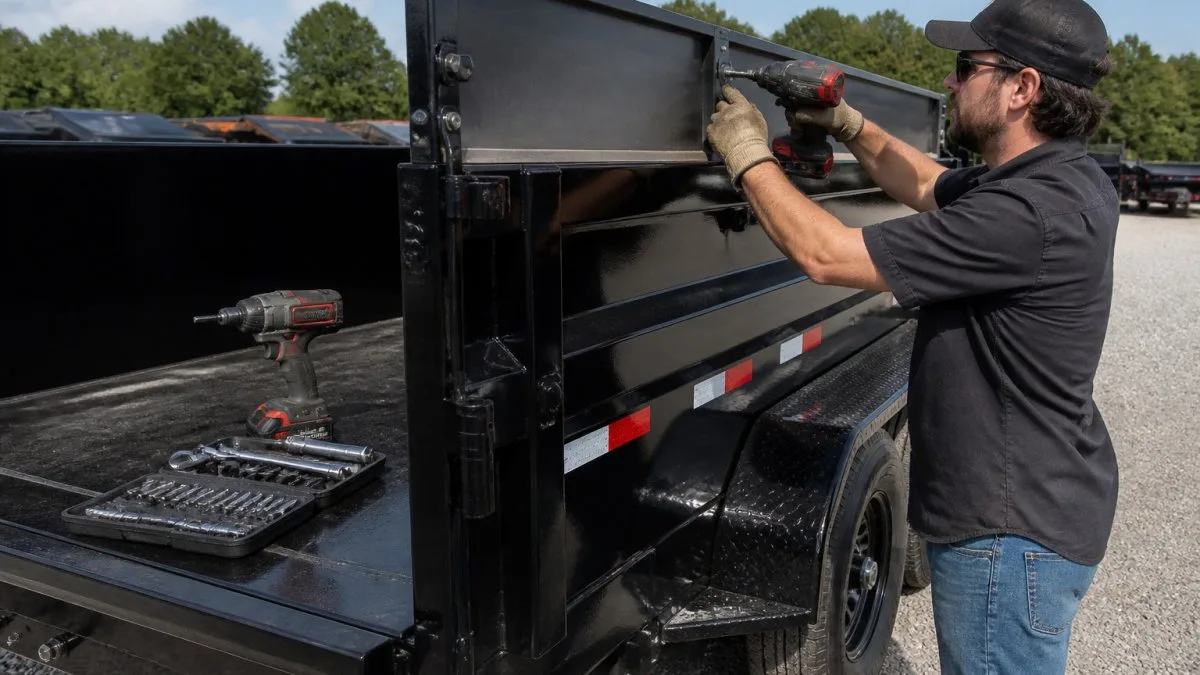
Tools and hardware to have on hand
- A power drill with bits sized to your mounting holes, plus a step bit for enlarging holes cleanly
- A socket set and wrenches matched to the included hardware
- Bolts, washers, and locking nuts, usually supplied with the kit, use locking nuts or thread-locker, not plain nuts
- Extension brackets or stake-pocket receivers, which hold the boards to the trailer rails
- A tape measure, a 4-foot level, and a marker
- A dead-blow hammer for seating boards into pockets
- Safety glasses and gloves
Step-by-step installation
- Park and stabilize. Park the trailer on level ground, chock the wheels, and lower the tongue jack so the bed is flat. A trailer that is not level will produce extensions that look crooked.
- Lay out and inventory. Lay out the brackets and confirm you have every part listed in the kit. Missing hardware is the most common reason a first install stalls.
- Dry-fit before drilling. Set the first bracket or board in place without fasteners and check three things: the bracket sits flush on the rail, the board clears the gate through its full swing, and the top edge is level with the opposite side. Mark hole locations only after the dry-fit passes.
- Drill and bolt. Drill the holes, then bolt the bracket in place without fully tightening. Leave each fastener snug so you can shift the assembly during alignment.
- Repeat and level. Install the remaining brackets, checking the tops against a level or a string line as you go. Small errors compound across the length of the trailer.
- Set the boards. Slide or set the side boards into the brackets or stake pockets and secure them per the kit instructions.
- Torque in a crisscross pattern. Tighten all hardware in a crisscross pattern so the assembly pulls down evenly, then recheck the level.
- Cycle the gate. Open, close, and latch the tailgate through its full range with the extensions installed. Confirm the gate does not bind on the extensions and that the latch still engages fully.
- Road check. After the first few miles of driving, stop and re-torque every fastener. New installations routinely settle, and loose hardware is the most common cause of extensions shifting or separating under load.
Do not skip the gate-clearance check. Extensions that interfere with the tailgate swing or latch can prevent the gate from opening under load, which is a serious safety problem on a dump trailer.
Post-install inspection checklist
- Every bolt present and re-torqued after the first haul
- No cracks or elongation at drilled holes
- Extensions level side to side and front to back
- Tailgate opens, closes, and latches without binding
- No interference with fenders, lights, or the tarp system
- Boards seated fully in pockets or brackets with no side-to-side play
Run this checklist again after the first heavy load and at the start of each season.
The installation process breaks down into a clear sequence of steps, each with its own check.
| Step | What to do | Time or frequency |
|---|---|---|
| Park and stabilize | Park level, chock wheels, lower tongue jack | Before starting |
| Lay out and inventory | Confirm every kit part is present | Before starting |
| Dry-fit before drilling | Check flush fit, gate clearance, level top edge | Before drilling |
| Drill and bolt | Bolt brackets snug, not fully tightened | During install |
| Torque in crisscross pattern | Tighten all hardware evenly, then recheck level | After boards are set |
| Cycle the gate | Open, close, latch through full range | After install |
| Road check | Stop and re-torque every fastener | After first few miles |
Dump Trailer Side Extension Kit Fit: Measuring Your Trailer First
Before buying a kit, measure your trailer carefully. Record the overall length and width of the tub, the sidewall height from the floor to the top rail, and the rail profile. A kit that looks identical can fail to fit if the rail shape differs by even a small amount.
Compare your measurements against the kit's specifications. If your measured trailer needs a replacement or a matching unit, you can browse equipment trailers in stock. Ask the seller to confirm fitment in writing, and keep the trailer's VIN or model number with your order. If you are unsure, bring the trailer's details to your supplier before ordering.
Payload Limits, Axle Ratings, and Safe Loading With Extensions
Extensions add weight, and that weight reduces the payload you can legally and safely carry. Check the trailer's gross vehicle weight rating and axle ratings on the manufacturer's plate. Adding extensions does not change those ratings, so you must stay within them even when the tub holds more volume.
Heavy, dense material fills a tub by weight long before it fills it by volume. A tub with taller sides can hold a load that exceeds the axle rating. Load evenly, keep heavy material centered over the axles, and weigh the load when you are unsure.
Watch out: Filling extended sides with dense material like wet soil or concrete can overload the axles while the trailer still looks half empty. Weigh the load, not just the visible volume.
Dump Trailer Tarp Kit and Other Useful Accessories
A tarp kit keeps loads secure and reduces debris blowing off on the highway, which matters more when extensions raise the load above the rails. Many operators pair extensions with a tarp system so the material stays covered regardless of height.
Other accessories worth considering include spreader gates for controlled dumping, fenders for road debris, and lighting upgrades for safer towing. Choose accessories that match how you actually use the trailer rather than adding features you will not need.
Booking Your Side Extension Fitting at True North Trailers and Equipment
If you prefer professional installation, or you want help choosing the right extensions for your trailer, reach out to True North Trailers and Equipment. You can also see trailers for sale in the Louisiana area while you ask about fitting. If you prefer professional installation, or you want help choosing the right extensions for your trailer, contact True North Trailers and Equipment for current information and a quote. Whatever you decide, measure first, check your axle ratings, and load within your limits.
Frequently Asked Questions
What are dump trailer side extensions used for?
Side extensions raise the walls of an open dump trailer so it holds more loose material such as gravel, mulch, topsoil, or demolition debris without going up to a larger trailer. They are most useful when a job produces light, bulky loads that fill the bed before reaching the trailer's weight limit. Because they add volume rather than strength, they suit landscapers, property owners, and small contractors who run out of space before they run out of payload. Always confirm the combined load stays within the trailer's gross vehicle weight rating and the tow vehicle's capacity.
How do you install side extensions on a dump trailer?
Most installations start by measuring the existing side rails and confirming the kit's brackets match the trailer's frame. Mount the brackets to the top rail with the recommended bolts, washers, and nuts, then slide or bolt each side board into place and fasten it to the bracket. Torque all fasteners to the manufacturer's specification and recheck them after the first few loads. Follow the kit's instructions closely, since mounting points and hardware vary by model and trailer size.
Can side extensions increase a dump trailer's payload capacity?
Side extensions increase volume, not payload. A trailer's legal and safe weight limit is set by its axles, tires, frame, and gross vehicle weight rating, and adding boards does not raise any of those ratings. Extensions can let you fill the bed with lighter material, but a fully loaded trailer carrying dense material such as wet soil can still exceed its rating. Weigh loads when in doubt and stay below the GVWR printed on the trailer's certification label.
Should I buy a dump trailer side extension kit or build my own?
A pre-made kit is faster to install and usually matches the trailer's dimensions, while a custom build lets you choose material and height for a specific job. Kits suit most buyers with a common trailer size, and custom builds make sense for unusual trailers or heavy-duty needs. Whichever route you take, measure the trailer's width and rail spacing before ordering. For pricing, depending on quantity, delivery, and configuration, contact True North Trailers and Equipment for a current quote.
